When we are uploading an image as a document on any webpage or presentation, it shows us a message that the file size of the image you have uploaded is too large. What does it mean by being too large? How does it make any difference? When uploading an image on a web page, the larger is your file size, the more time and data it will consume to load that web page. As a result, web pages have a range of file sizes when uploading the image. So how to reduce the file size of an image to fit on the web page? What is a file size of an image anyway, and how does it affect the image?
What is an image file size?
We all know that images consist of pixels. Pixels are a cluster of tiny dots with a mixture of three primary colors RGB (Red, Green, and Blue). Now, to store a pixel, it usually takes 3 bytes. To store a large image with millions of pixels, it will take millions of such bytes to store all the information. As a result, it takes up a large space in your device to save all the information in a file.
For example, you take a selfie in your 16-megapixel front camera. It means that the selfie image that you clicked takes (mega = million. i.e 16 1,000,000 pixels) or (161,000,000 3 bytes = 48,000,000 bytes) worth of space to store that selfie. Accordingly, it takes a long while to upload and download if you want to transfer the selfie on the internet. Hence file size is the space used by your device to save all the information of the image.
So how do we deal with this? Is there any solution to this problem?
Now that we know what file size is, we need to figure out how to reduce the file size of an image. Is there any way to go about it? Yes. Primarily there are two ways about it. One is you either compress the image, or the other way about it is to resize the image. On compressing the image, the file size is reduced without resizing the image. However, when you do this, it affects the image’s quality due to the loss of image data during compression. The other option where we choose to resize the image will reduce the number of pixels used to store the data. Doing this will reduce the file size of an image proportionally. This way, you do not decrease the image’s quality, but you may lose small details if they become too small.
Resize and compress:
You would be surprised that a smartphone camera generally has more than 5-megapixels, whereas most screen devices have only 1.5-megapixels. So when you see them, you see the resized form of that image. This means that when you resize the image by decreasing its length and breath almost half, it will yet have almost the same number of pixels that the screens displaying it will have. Thus, you will not be compromising on the quality or the details of the picture at all, even when you are looking at it in full-screen mode.
So the trick is that if you have a huge or spacious image, you can deal with your problem on How to reduce the file size of an image by resizing it until it’s about 19001100 pixels and making it a JPG image by compressing it a little by 95% quality. This will give you an image with great quality and save your time as well as the bandwidth of your internet data plan from vamoosing away.
Use online tools:
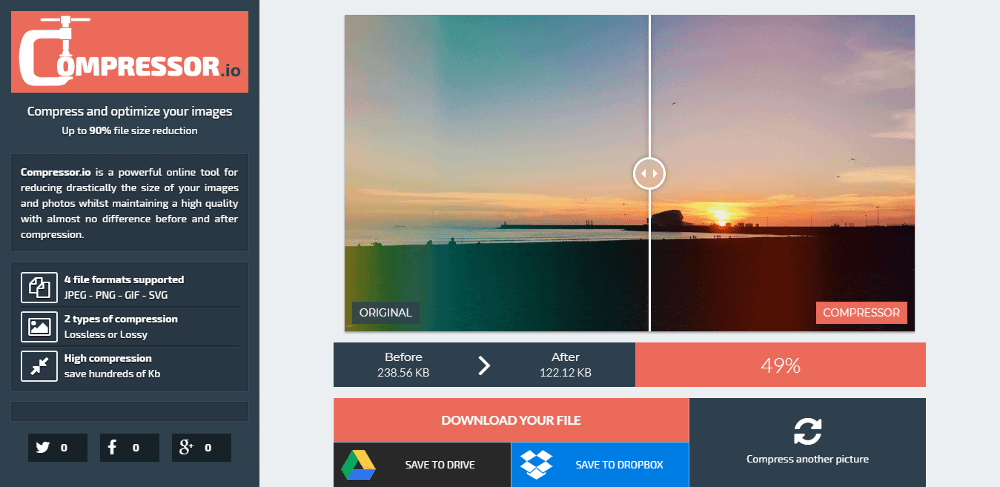
Another way about it if you don’t want to do it manually in paint yet not download a third-party app and bulk up your device unnecessarily (or you are using someone else’s device) you can use various resizing tools that are available online which you can access through your web browser. These tools apply both the ways of compressing and resizing to reduce the file size of an image dilemma. They compress the file size of an image first and then reduce its size by saving the end product in either of the image formats such as JPG, GIF.
One of our favorites is resizeimage.net. It’s a free online image resizer that lets you resize, edit, crop, compress and optimize images. Unlike other sites, this one does not upload images to the server, and your image never leaves your device. This makes it comparatively faster and easy to access.
Steps to follow:
Following are the instructions to get you started with reducing the file size of an image on resizeimage.net:
- Open your internet browser and type resizeimage.net on the address bar, and press enter. This will take you to the site.
- Click on “Upload an image” on the site, select the desired image, and press open.
- It will preview the image you selected in the below section. It provides you with options to crop, rotates, resizes, makes the background transparent, selects an output image format, and optimize the image. Click on “Resize your image” to reduce the size of your image.
- Enter the number of required pixels in the given boxes. Do not uncheck the “Keep aspect ratio” option to maintain the ratio of your image.
- Select the desired “image format” option (PNG, JPG, GIF, BMP).
- Press the “Resize” option to reduce the size of the image as per your need.
It will be automatically saved on your device once the image is resized.
Use built-in features:
How to reduce the file size of an image when you have a device, but your wifi or internet connection is acting up? In situations like this? Go to your device’s image previewing program. They have a built-in feature that allows manipulating the size of the image. It provides you options either to enlarge or to reduce the file size of an image. Most image viewing programs have a built-in feature to help you change the size of images. Check out our favorite image resizing tools for Windows. They will help you with How to reduce the file size of an image without the internet?
Use paint to reduce the size of the image:
Paint is one of the easiest, simplest, and most straightforward ways to enlarge or reduce the size of an image. It is built in even the most basic to advanced versions of windows. It has the most common forms to save file types such as GIF, TIFF, JPG, PNG, and BMP.
To reduce the file size of an image in paint, follow the steps mentioned below.
- Go to Paint, and click on “Open” from the File Menu.
- Browse through the images shown in the open menu. Select the desired image and then click on open.
- Now go to the Home tab of the paint toolbar and click on the “Resize” button.
- A resize, and the skew tab will pop up. Here you can resize it either by percentage or pixel. Enter the desired proportion you need to reduce the size of an image and press okay. Your image will be reduced.
P.S: Use percentage if you want a rough resizing and pixels for detailed resizing. You can also follow the same method in Paint 3D, and it will give you the same results.
Use third-party apps:
You know how to reduce the file size of an image if you frequently need to reduce the size of an image. Yet, it’s inconvenient to go on the web browser, type the site and then follow the steps to resize an image. Instead, you can download third-party apps from your ios/android/windows app store. One of the best third-party apps to reduce the file size of an image is PicPick.
PicPick on face value has quite a similar-looking interface to Paint. Yet, it has various other features up its sleeves. It has better editing, better annotation tools, and solid screen capture utility. This serves a purpose to professionals as well as rookies. It’s free for personal use. However, its licensed version costs $25 for commercial purposes.
Steps to follow:
Following are the steps to know how to reduce the size of an image in the PicPick third-party app.
- Go to your device’s app store and download the PicPick photo resize app.
- Open the app and click the “Open an existing image” link on the PicPick splash screen.
- Next, select the desired image you want to resize. Alternatively, you can also drag and drop an image from File Explorer to an open PicPick window.
- Click on the “Resize” button from the toolbar to reduce the desired image’s file size. Then click on “Image resize” from the dropdown menu.
- Select the required percentage or pixel as per your requirement and then click on “OK.” Do not uncheck the “Keep Aspect Ratio” option that’s given on the side. This will help you resize your image without disturbing its ratio.
PicPick has both the percentage as well as pixel option to let you resize the image. To roughly resize the image without any fixed ratio in mind, you can use the default percentage option. However, if you require to resize the image to a certain dimension, you can opt for the pixel option. The pixel option will enable you to resize the image to a pinpoint level.
Things to consider while you reduce the file size of an image:
You are now all set and have figured out how to reduce the file size of an image. To further make it convenient, the following are the things you should keep in mind while resizing an image. Have a quick look at them here:
Quality of original image:
- To resize an image, the quality of the image you resized depends largely on the original image’s file size that you are trying to resize.
- Images have a lot of details in them. The outcome is comparatively better when it is reduced instead of enlarged. When you enlarge an image, the pixels get scattered and reduces the quality of the image.
High-resolution pictures:
- High-resolution photos are highly susceptible to getting blown up to larger sizes. If they are enlarged to a certain ratio, the picture quality gets slightly affected. The image gets grainy when the image is enlarged disproportionately above its limits.
- For instance, let’s take an example to get a better understanding of this. We took a photo that has an original file size of 2200×1938 pixels. Now we take that image and crop it down to the file size of mere 400×352 pixels. The image’s quality is still crisp, clear even when it is reduced to a quarter of its size.
Working with an image containing text:
To resize an image that is a screenshot you took on your PC or mobile, or other devices, resizing them would not work as amazingly as it would do with normal pictures. This will be the same case even for the pictures that contain text in them.
When you try to reduce the file size of such an image, it will distort the image. The written text might crumple or merge, making it visually straining or difficult to read. It’s okay if you want to show the broad look of things, but not so much for detail.
We resized a screenshot taken at 1920*1040 pixels down to 600*317 to fit on our site for trial purposes. The outcome was not satisfying or visually appealing.
Cropping out:
Although you might need to crop, we found an alternative to this. We cropped the screenshot and resized them instead of reducing the file size.
We hope that your doubts on how to reduce the file size of an image are clear now. Tell us which one was your favorite method. Do you have any favorite methods that we miss out on? Let us know in the comments, and we will cover them in the next article.